Do you remember that in the last post we told you how to configure a Raspberry Pi server? Well, the story did not end there. This time we are going to tell you how to secure it. Are you interested in the idea?
When configuring our network devices, it is as important to configure the most basic parts of their operation as it is to configure their vulnerability and security against external agents.
Therefore, once we have seen the first part of how to configure a Raspberry Pi, we will then look at the second part of the post where we will finish configuring our Raspberry as an internal file server and we will add an additional layer of security to prevent possible hacking.
For what purposes can our Raspberry be hacked?

- One of the main options is normally to use it to mine cryptocurrency. By hacking several Raspberrys, their computing power can be used for this purpose.
- Another typical case of hacking is to create a small "army" to attack other hosts. When done with third-party devices, this attack leaves no trace of its origin.
- Finally, another case is to exploit a vulnerability to enter our internal network. If we don't have good security, an attacker can easily reach the file servers and try to install ransomware, obtain documents or manipulate the configuration.
Installing SAMBA in Raspberry Pi to share resources
Samba is a free implementation of the Microsoft Windows file sharing protocol for Unix-like systems. It is thus possible for computers like Linux, Mac OS X or Unix to be seen as servers or to act as clients in Windows networks. Samba is a free software project that implements the Windows file sharing protocol for Unix-like operating systems.
To install it, we have to run the following command from our terminal:
sudo apt-get install samba samba-common-bin
Depending on what other things we have installed on the Raspberry, we may or may not be asked to install additional packages.
Next, the software is downloaded and installed automatically.
Once the installation is complete, we will need to make changes in the configuration to adapt it to our needs. First, we will make a backup copy of the configuration file in case we break something :D
sudo cp /etc/samba/smb.conf smb.backup
sudo nano -w /etc/samba/smb.conf
In the configuration file, we will edit it to indicate which hard drive we want to share, in our case /media/64GB
[pi 64GB]
comment = USB Share
path = /media/64GB
writeable = Yes
create mask = 0777
directory mask = 0777
browseable = Yes
valid users @users
force user = pi
To save the file with the changes, press the Ctrl key and the "O" key at the same time.
To exit the editor, we must press the Ctrl key and the "X" key at the same time.
Once we exit the editor, we must add the Pi user to the SAMBA user group in order to access the shared resource. To do so, we enter the following command:
sudo smbpasswd -a pi
To confirm, we must enter the password twice. Once the user is done, it will be added to the group.

Securing our Raspberry
Raspberry uses the pi user by default. For security, it's better to create a new one and disable the pi user.
This way, a new account will be created and a directory will be generated for our account (type/home/username)
Once the user account is created, we must change its password. To define it, we enter the following command:
$ sudo passwd username
It's also a good idea to change the password for the root user, by entering a complex password. To change the password for the root user, we will use the following command:
$ sudo passwd root
Finally, we will deactivate the default account of the Pi user. To do so, we must enter the following command in the terminal:
$ sudo passwd –lock pi
Now, if we are connecting via SSH, we can disconnect from the Raspberry and log in with the new user account and password.
Changing the SSH Raspberry Pi port
Another very simple security measure to perform, that is of vital importance, is to change the SSH port on our Raspberry. To do so, we must edit the file /etc/ssh/sshd_config
Just like in the previous steps, if you'd like, you can make a backup of the file for security. It would be done in the following way:
sudo cp /etc/ ssh /sshd_config smb_config_backup
Once the backup is done, we will run the following command as root from the terminal:
nano /etc/ssh/sshd_config
Within the configuration file, we will see the following appear in one of the first lines:
Port 22
We will change the 22 for another number that will become the new port. This number must be greater than 1024.
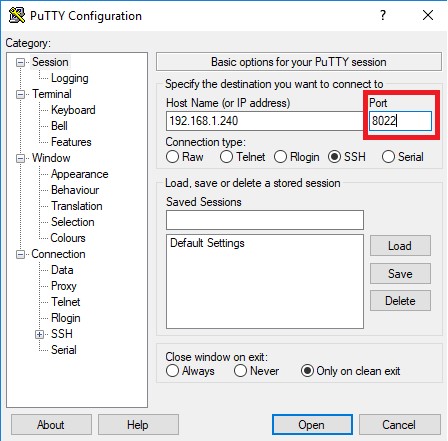
In our case, we used 8022 as an example, and the line would be:
Port 8022
We close the editor and save
Next, we restart the SSH service to apply the new configuration:
/etc/rc.d/ssh restart
From now on, in PuTTY we will have to enter Port 8022 to access our Raspberry.
Installing Fail2ban
The purpose of installing Fail2ban is to protect against brute-force attacks that anyone can generate on our Raspberry Pi.
What is a brute-force attack? A brute-force attack is basically an attempt to try to crack a password by trying all the possible combinations until the correct one is found. These methods aren't very efficient since they require a lot of time to test out different combinations. Even so, they are usually based on possible combinations from a dictionary, where the more common and generic passwords are usually found.
In order to avoid this type of attack, we will use Fail2ban. Fali2ban is a programme that automatically scans the logs of our Raspberry Pi and bans the IPs that it considers to be malicious. For example, the software considers an IP to be malicious if it has made several access attempts with a password error. It's possible to configure the thresholds, indicating how many attempts is required in order to consider an IP malicious and, for example, indicating how long the ban is to last.
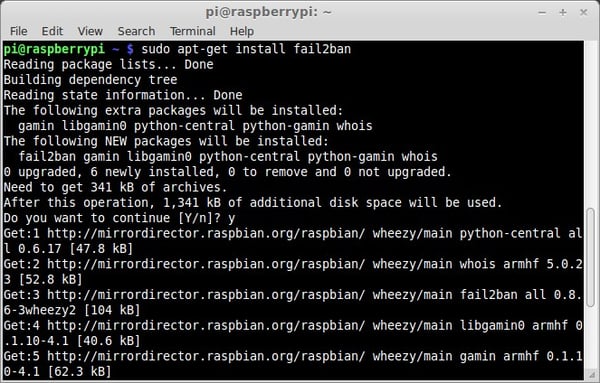
To install it, we will enter the following command in the terminal:
sudo apt-get install fail2ban
The installation process for fail2ban will begin on our Raspberry:
Once installed, as previously mentioned, we will proceed to configure it to parameterise the banning tools.
We are going to configure the threshold so that it bans the IPs for 30 minutes when they try to gain access 3 times with an incorrect password.
Fail2ban scans the file /var/log/auth.log, applying the /etc/fail2ban/filter.d/ssh.conf filter.
We will modify the configuration from the /etc/fail2ban/jail.conf file.
Modifying only the parameters for the duration of the ban and the number of attempts required to activate the ban. Many other additional configurations can still be created.
The configuration file would look like this:
ignoreip = 127.0.0.1/8
bantime = 1800
maxretry = 3
[apache]
enabled = true
[ssh-ddos]
enabled = true
[pure-ftpd]
enabled = true
If you want to check if Fail2ban is working correctly, we can enter the following command:
cat /var/log/fail2ban.log
Once all the changes and configurations have been made, you will have your Raspberry Pi running safely.

We know that the series of posts on configuring your Raspberry Pi is extensive, so take your time and reread the post as many times as you need.